Posted on August 23, 2023
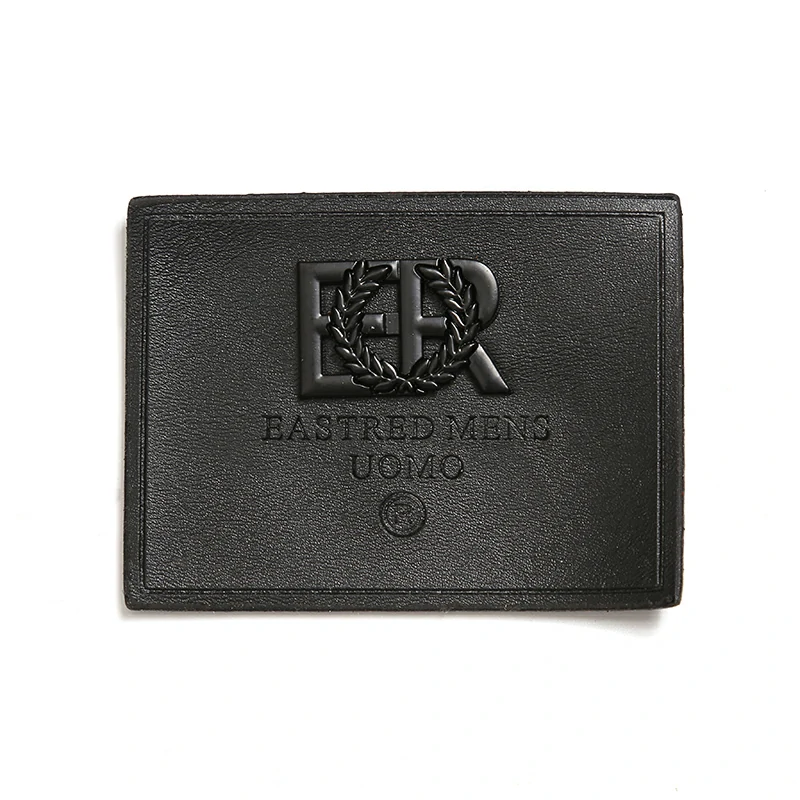
How to prevent oxidation of engraved metal keychain?
Here are some tips to help prevent oxidation (rust) on an engraved metal keychain:
Use a corrosion-resistant metal.
Stainless steel, nickel silver, or brass will hold up better than steel.
Apply a clear sealant.
Use a polymer or lacquer spray specifically made for metal protection. Reapply every 6-12 months.
Wax treatment.
Rubbing on a thin layer of paraffin or car wax forms a protective barrier and can be touched up as needed.

Oil lightly.
A small amount of mineral, motor, or silicone oil rubbed in the engraving helps displace water.
Dry completely.
Make sure the surface is fully dried after exposure to moisture to avoid rust spots.
Limit moisture exposure.
Avoid getting the keychain wet frequently from things like rain or sweaty hands.
Carry in a dry pouch.
Storing inside a small cloth or leather bag keeps it separated from loose change/keys.
Clean gently.
Use a soft cloth or small brush to remove dirt buildup from engraving where rust can form.
Check periodically.
Inspect engraving every few months and reapply protection treatments as signs of oxidation appear.
Keeping the engraving coated, dry and clean helps most metals maintain their shine and legibility over time.
Posted on August 11, 2023
What are some common applications where customized ceramic fiber vacuumare used?
Here are some common applications where customized ceramic fiber vacuum blankets and modules are used:
Furnaces and kilns
Used to insulate industrial furnaces, kilns, ovens and other manufacturing equipment operating at high temperatures.
Glass industry
Provides thermal insulation for glass manufacturing processes like melting, forming, annealing that require exposure protection up to 1600°C.
Aluminum industry
Used in aluminum melting furnaces, casting equipment and holding ladles to protect from radiant heat.
Steel industry
Applies to EAF mini mills, ladles, tundishes and other areas in steel production needing high-temperature protection.
Petrochemical industry
Ideal for insulating reactors, boilers, steam lines and processing equipment in oil refineries and chemical plants.

Ceramics industry
Suits insulation needs in pottery kilns, drying ovens and for firing ceramics at very high temperatures.
Waste incineration
Helps maintain operating temperatures in hazardous/medical waste, combustion and plasma torch applications.
Automotive exhausts
Custom blanket shapes withstand heat radiating from manifolds, converters and tailpipes of engines.
Thermal processing
Used in heat treatment of metal components like brazing, tempering, annealing and hardening furnaces.
Laboratories
Provides safe, reliable insulation for research furnaces, autoclaves and other specialized lab equipment.
Updated on August 4, 2023
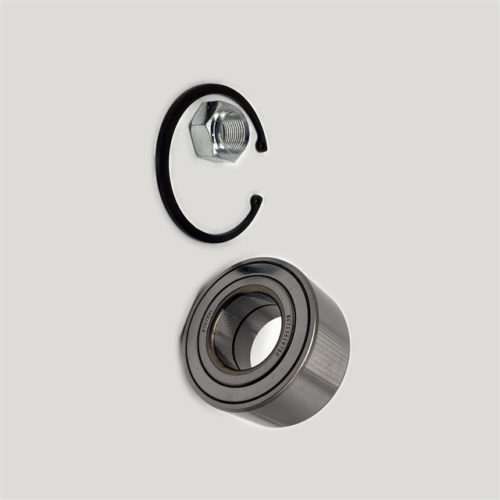
What are the torque specifications for installing wheel bearings?
Wheel bearings are components that are located in the hub or spindle of a vehicle’s wheel assembly. They are responsible for supporting the weight of the vehicle and enabling the wheel to rotate smoothly and efficiently.
Here are some important things to know about wheel bearings:
Types of wheel bearings: There are two main types of wheel bearings: ball bearings and roller bearings. Ball bearings are more common and are used in most passenger cars and light trucks, while roller bearings are typically used in heavy-duty vehicles.
Signs of worn wheel bearings: Some common signs of worn wheel bearings include a humming or grinding noise coming from the wheel area, uneven tire wear, and steering wheel vibration. If you notice any of these signs, have your vehicle inspected by a qualified technician.
Maintenance: Wheel bearings require little maintenance, but it’s important to keep them properly lubricated. If the wheel bearings are not properly lubricated, wheel bearing suppliers they can become damaged and require replacement.
Replacement: Wheel bearings are typically replaced as a unit and should be replaced in pairs, even if only one is damaged. It’s important to use high-quality replacement bearings that are compatible with your vehicle.
Installation: Proper installation is critical to the performance and longevity of wheel bearings. Wheel bearings should be installed according to the manufacturer’s specifications and torque specifications.
Service intervals: Some manufacturers recommend replacing wheel bearings at specific service intervals, such as every 100,000 miles. However, the service interval can vary depending on the vehicle and driving conditions. Consult your vehicle’s owner’s manual or a qualified technician for guidance on the appropriate service interval for your vehicle’s wheel bearings.
By understanding the importance of wheel bearings and taking proper care of them, you can help ensure the safety and optimal performance of your vehicle.
The torque specifications for installing wheel bearings can vary depending on the vehicle make and model, as well as the specific bearing and hub assembly being installed. It’s important to refer to the manufacturer’s specifications for the correct torque values.
In general, most wheel bearings are installed using a two-step process:
Tighten the nut to a specific torque value, typically between 50 and 100 foot-pounds, to seat the bearing.
Back off the nut by a specific amount, typically between 1/8 to 1/4 turn, to allow for proper bearing adjustment and prevent excessive preload.
The final torque value for the nut will depend on the specific type of bearing and hub assembly being installed. Some manufacturers may also recommend a specific sequence for tightening the nut.
It’s important to use a torque wrench to ensure that the nut is tightened to the correct torque value. Over-tightening the nut can result in excessive preload on the bearing, which can cause premature wear and damage. Under-tightening the nut can result in loose bearings, which can cause noise, vibration, and potentially lead to wheel separation.
If you are unsure about the torque specifications for your specific vehicle or bearing assembly, consult your vehicle’s owner’s manual or a qualified technician for guidance.
Posted on August 4, 2023
How can I determine the necessary seal strength requirements for my specific packaging material?
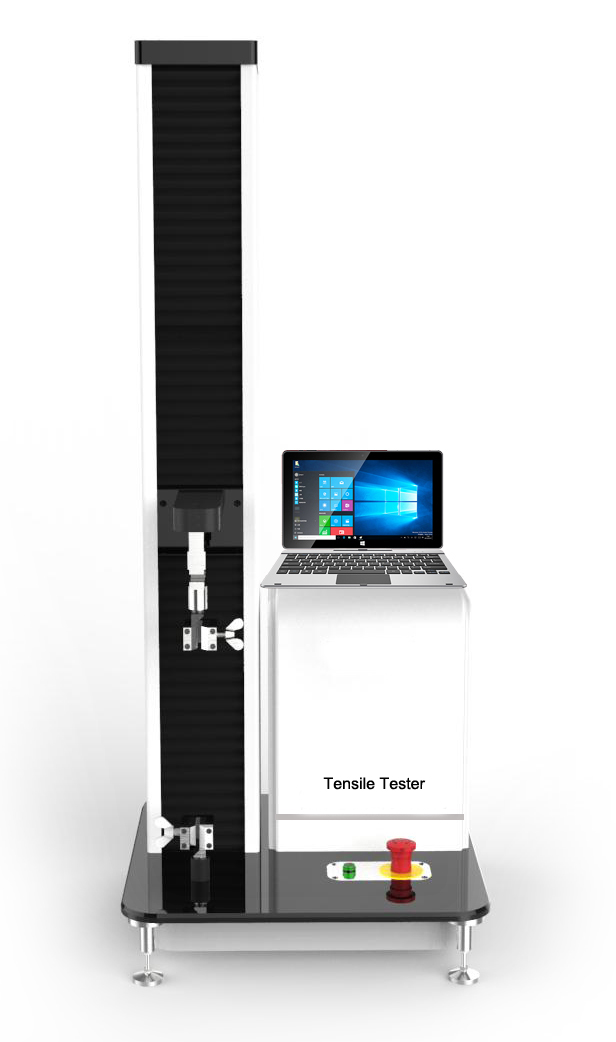
The seal strength test is a method used to determine the strength or integrity of seals on packaging materials, such as pouches or bags. The test measures the force required to separate a seal in a controlled manner.
There are several methods used to perform a seal strength test, including the following:
T-peel test: This method involves cutting a strip of the sealed material and pulling it apart at a 180-degree angle. The force required to pull the material apart is measured.
90-degree peel test: This method involves pulling the material apart at a 90-degree angle to the seal. The force required to peel the material apart is measured.
Burst test: This method involves applying pressure to the sealed material until it bursts. The force required to burst the material is measured.
Lap shear test: This method involves cutting the sealed material perpendicular to the seal and pulling the material apart at a 180-degree angle. The force required to separate the material is measured.
The specific test method used depends on the type of material being tested and the intended use of the package. The test equipment used for seal strength testing can vary, but typically involves a tensile testing machine or a specialized seal strength tester.
The seal strength test is an important quality control measure in the packaging industry, as it ensures that the seals on packaging materials are strong enough to withstand the intended use and prevent product contamination or damage.
Determining the necessary seal strength requirements for your specific packaging material depends on several factors, such as the type of material, the intended use of the package, and industry regulations.
Here are some steps that can help you determine the necessary seal strength requirements for your packaging material:
Understand the material: Learn about the properties of the packaging material, such as the thickness, composition, and sealing characteristics. This information can help you determine the appropriate seal strength requirements.
Determine the intended use: Consider the intended use of the package, such as storage, transport, or sterilization. seal strength test method Different uses may require different seal strengths to ensure the package remains intact and the contents are protected.
Consult industry regulations: Consult relevant industry regulations, such as those set by the United States Food and Drug Administration (FDA) or the International Safe Transit Association (ISTA). These regulations may provide guidelines or requirements for seal strength testing and may specify minimum seal strength values.
Perform testing: Perform seal strength testing on the packaging material using appropriate test methods and equipment. This can help determine the necessary seal strength requirements for your specific package.
Evaluate results: Evaluate the results of the seal strength testing to determine if the seal strength meets the necessary requirements for the intended use of the package. If the seal strength is not adequate, adjust the sealing conditions or consider using a different packaging material.
By following these steps, you can determine the necessary seal strength requirements for your specific packaging material. This can help ensure that the package is of high quality and meets the necessary standards for safety and performance.
Posted on July 28, 2023
How does alumina silicate board compare to other refractory materials in terms of cost?
The cost of alumina silicate board can vary depending on several factors, including the specific application, the size of the project, and the supplier. In general, alumina silicate board is a cost-effective option compared to other refractory materials, such as bricks and precast shapes.
Here are some reasons why:
Lower Material Costs: Alumina silicate board typically requires less material compared to other refractory materials, such as bricks and precast shapes. This can help to reduce material costs and overall project costs.
Reduced Labor Costs: Alumina silicate board can be easily cut and shaped to fit specific applications, and it can be installed using standard tools and techniques. This can help to reduce labor costs compared to other refractory materials that require more specialized installation methods.
Faster Installation: Alumina silicate board can be installed quickly and efficiently, which can help to reduce overall project time and costs. This is especially important in applications where downtime can be costly.
Versatility: Alumina silicate board can be used in a variety of applications, including furnace linings, kiln linings, and other high-temperature equipment. This versatility can help to reduce overall costs by using a single material for multiple applications.
Reduced Maintenance Costs: Alumina silicate board has high strength and can withstand high temperatures, thermal shock, and chemical exposure. This means that it requires less maintenance compared to other refractory materials, which can help to reduce maintenance costs and increase the lifespan of the refractory lining.
Overall, alumina silicate board is a cost-effective option for many high-temperature industrial applications. Its lower material and labor costs, faster installation, versatility, and reduced maintenance costs make it a popular choice for industries that require reliable and efficient refractory solutions. However, it’s important to consider the specific application and consult with a refractory expert to determine the most cost-effective solution for your needs.
What are some factors to consider when determining the most cost-effective refractory solution for a specific application?
Determining the most cost-effective refractory solution for a specific application involves considering several factors.
Here are some of the key factors to consider:
Operating Conditions: The operating conditions, such as temperature, thermal shock, abrasion, and chemical exposure, can affect the lifespan and performance of the refractory material. Selecting a material that is suitable for the specific operating conditions can help to ensure that the material lasts long and performs efficiently.
Material Properties: Different refractory materials have different properties, such as thermal conductivity, density, strength, and chemical resistance. alumina silicate board Choosing a material that has the desired properties for the specific application can help to ensure that the material performs efficiently and provides the required protection.
Installation Method: Some refractory materials can be installed using standard installation methods, while others require more specialized methods. Choosing a material that can be installed efficiently and cost-effectively can help to reduce labor costs and overall project costs.
Maintenance Requirements: Some refractory materials require more maintenance than others. Choosing a material that requires less maintenance can help to reduce maintenance costs and increase the lifespan of the refractory lining.
Cost: The cost of the refractory material and installation is an important factor to consider. While lower-cost materials may seem more attractive, they may not provide sufficient protection or have a short lifespan. Choosing a material that provides the required protection and has a longer lifespan can ultimately be more cost-effective in the long run.
Sustainability: Sustainability is an increasingly important factor to consider. Choosing refractory materials that are more sustainable, such as materials made from recycled or natural materials, can help to reduce environmental impact and support sustainability goals.
By considering these factors, companies can select the most cost-effective refractory solution for their specific application. It’s important to consult with a refractory expert to determine the best material and installation method for the specific application and operating conditions.
Updated on July 28, 2023
The Advantages and Disadvantages of real leather patch
Real leather patches are often used in the fashion industry as a way to add a high-quality and premium feel to clothing and accessories. However, like any material, real leather patches have both advantages and disadvantages.
Here are some of the key advantages and disadvantages of real leather patches:
Advantages:
High Quality: Real leather patches are made from genuine animal hides, which gives them a high-quality look and feel.
Durability: Leather is a durable material that can withstand wear and tear, making it a popular choice for patches that will be subjected to regular use.
Natural Material: Leather is a natural material that is biodegradable and more sustainable than many synthetic materials.
Versatile: Leather patches can be used on a variety of items, including clothing, bags, and accessories, and can be customized with logos or designs.
Aesthetic Appeal: Leather patches can add a premium and stylish touch to clothing and accessories, making them more attractive to customers.
Disadvantages:
Cost: Real leather patches can be more expensive than synthetic alternatives, which can make them less accessible to some consumers.
Sustainability: While leather is a natural material, it still requires significant resources and energy to produce, and its production can have negative environmental impacts.
Maintenance: Leather requires regular cleaning and conditioning to maintain its appearance and durability, which can be time-consuming and expensive.
Allergies: Some people may be allergic to leather, which can cause skin irritation or other reactions.
Limited Availability: Real leather patches are limited by the availability of animal hides, which can vary depending on factors such as demand, regulations, and farming practices.
Overall, real leather patches have several advantages, including high quality, durability, and aesthetic appeal. However, they are also associated with higher costs, maintenance requirements, and environmental impacts, which can be seen as disadvantages.real leather patch Choosing whether to use real leather patches will depend on the specific application, customer preferences, and sustainability goals of the company.
How can companies ensure the ethical sourcing of animal hides for leather patches?
Ensuring the ethical sourcing of animal hides for leather patches is an important consideration for companies that use real leather in their products.
Here are some ways that companies can ensure ethical sourcing:
Traceability: Companies can work with suppliers who have a traceability system in place that allows them to track the source of animal hides. This can help to ensure that the hides are obtained from ethical sources and not from illegal or unethical practices.
Certification: Companies can look for suppliers who are certified by organizations such as the Leather Working Group or the Responsible Leather Roundtable, which have standards for the responsible sourcing of leather.
Transparency: Companies can request information from suppliers about their sourcing practices, including details about the farms or facilities where the animals were raised and how they were treated.
Animal Welfare: Companies can prioritize suppliers who have animal welfare policies in place, such as those that comply with animal welfare laws and regulations and prohibit cruel practices.
Environmental Sustainability: Companies can also prioritize suppliers who prioritize environmental sustainability, such as those who use sustainable farming practices, minimize waste and pollution, and prioritize the responsible use of natural resources.
Audits and Inspections: Companies can conduct audits and inspections of their suppliers to ensure that they are complying with ethical sourcing standards and policies.
By prioritizing ethical sourcing, companies can ensure that their use of real leather is responsible and sustainable. This can help to build trust with customers and support the long-term success of the business.
Updated on July 5, 2023
What are the pros and cons of using a menstrual cup?
Menstrual cups are a popular alternative to traditional pads and tampons, and they have both advantages and disadvantages.
Here are some pros and cons of using a menstrual cup:
Pros:
Reusability: Menstrual cups are reusable and can be used for up to 10 years with proper care and maintenance. This can save money and reduce waste compared to disposable pads and tampons.
Environmentally friendly: Menstrual cups produce less waste than disposable pads and tampons, making them a more eco-friendly option.
Convenience: Menstrual cups can be worn for up to 12 hours, which means less frequent changes compared to pads and tampons.
Comfort: Many people find menstrual cups to be more comfortable than pads and tampons, as they do not cause irritation or dryness.
Lower risk of toxic shock syndrome: Menstrual cups have a lower risk of toxic shock syndrome compared to tampons, as they do not absorb blood.
Cons:
Learning curve: It can take some time to learn how to use a menstrual cup properly, which can be frustrating for some people.
Messy: Emptying and cleaning the menstrual cup can be messy, especially in public restrooms or other less-than-ideal situations.
Cost: While menstrual cups can save money in the long run, they have a higher upfront cost than disposable pads and tampons.
Not suitable for everyone: Menstrual cups are not suitable for everyone, as they require insertion into the vagina. Some people may find this uncomfortable or difficult.
Maintenance: Menstrual cups require regular cleaning and maintenance to avoid infection and ensure longevity.
Overall, menstrual cups are a safe and effective alternative to traditional pads and tampons. However, they may not be suitable for everyone and require a bit of a learning curve. It’s important to consider your personal preferences and needs when deciding whether a menstrual cup is the right choice for you.
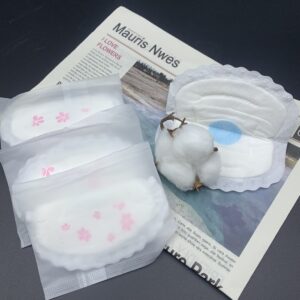
What are some tips for cleaning and maintaining a menstrual cup?
Cleaning and maintaining your menstrual cup is important to ensure its longevity and to prevent infection.
Here are some tips for cleaning and maintaining your menstrual cup:
Wash your hands before and after handling your menstrual cup to prevent the spread of bacteria.
Rinse your menstrual cup with cold water before washing it to help remove any blood or debris.
Wash your menstrual cup with mild, unscented soap and warm water. Avoid using harsh soaps or cleaning agents, cheap feminine pads as they can damage the silicone and cause irritation.
Make sure to clean all areas of the menstrual cup, including the rim and the suction holes.
Boil your menstrual cup in water for 5-10 minutes between menstrual cycles to sterilize it. This can help kill any bacteria or germs that may be present.
Store your menstrual cup in a breathable pouch or container between menstrual cycles. Avoid storing it in an airtight container, as this can trap moisture and promote the growth of bacteria.
Check your menstrual cup for signs of wear and tear, such as cracks or tears. If you notice any damage, replace your menstrual cup immediately.
Avoid using any sharp objects or abrasive materials to clean your menstrual cup, as this can damage the silicone and cause irritation.
By following these tips, you can help ensure that your menstrual cup remains clean and hygienic, and that it lasts as long as possible.
Updated on July 5, 2023
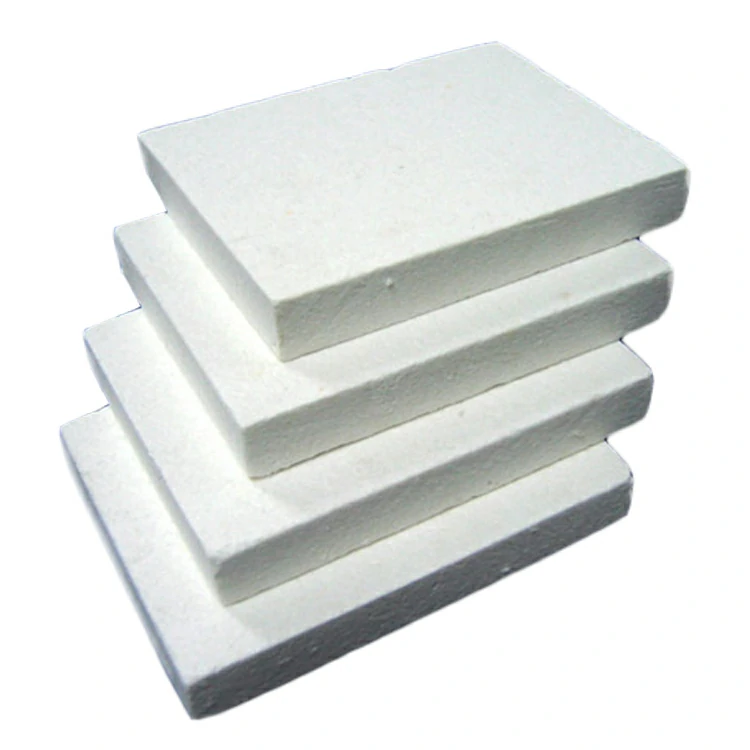
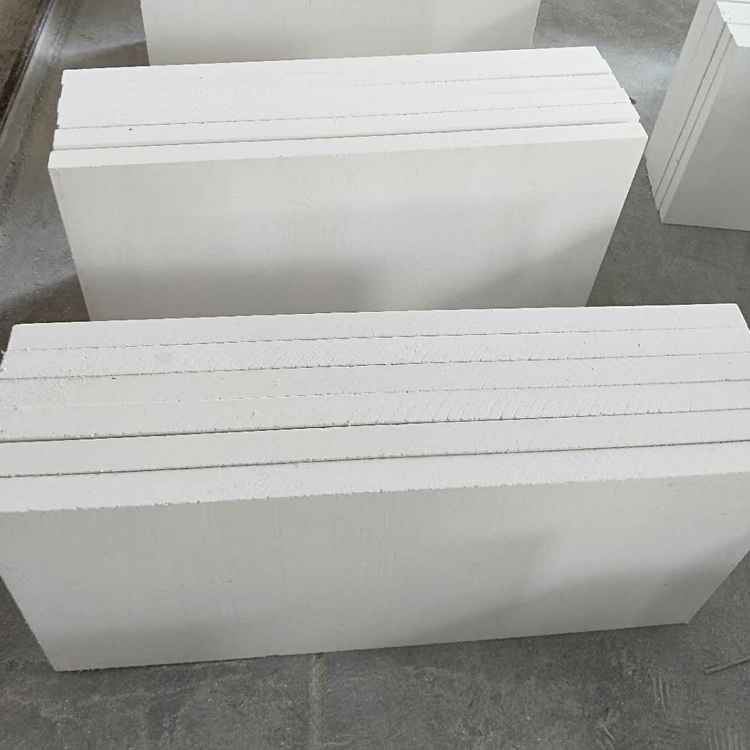
What is the recommended density for calcium silicate insulation in high-temperature applications?
The recommended density for calcium silicate insulation in high-temperature applications depends on the specific application and temperature range. Generally, higher-density calcium silicate insulation has better thermal performance than lower-density insulation.
In high-temperature applications, the recommended density for calcium silicate insulation typically ranges from 220 to 320 kg/m³ (14 to 20 lb/ft³). However, for extremely high-temperature applications, such as in furnace linings, densities of up to 640 kg/m³ (40 lb/ft³) may be required.
Higher-density calcium silicate insulation offers several benefits, including:
Improved thermal performance: Higher-density insulation has a lower thermal conductivity, which means it is better able to resist heat transfer and provide better insulation.
Improved strength: Higher-density insulation is more durable and can better withstand mechanical stresses, making it more suitable for high-temperature applications.
Reduced shrinkage: Higher-density insulation is less likely to shrink or deform over time, which can help maintain its thermal performance and insulation properties.
When selecting the appropriate density of calcium silicate insulation for a high-temperature application, it is important to consider the specific requirements of the application, including the temperature range, mechanical stresses, calcium silicate thermal conductivity and insulation performance requirements. It is recommended to consult with a manufacturer or supplier of calcium silicate insulation to determine the appropriate density for your specific application.
What are the benefits of using higher-density calcium silicate insulation in high-temperature applications?
There are several benefits of using higher-density calcium silicate insulation in high-temperature applications:
Improved thermal performance: Higher-density calcium silicate insulation has a lower thermal conductivity than lower-density insulation. This means it is better able to resist heat transfer and provide better insulation, which can help reduce energy costs and improve overall energy efficiency.
Greater strength and durability: Higher-density calcium silicate insulation is more resistant to mechanical stresses, making it less likely to crack or break under high-temperature conditions. This can help extend the lifespan of the insulation and reduce maintenance and replacement costs over time.
Reduced shrinkage: Higher-density calcium silicate insulation is less likely to shrink or deform over time, which can help maintain its thermal performance and insulation properties. This is particularly important in high-temperature applications where the insulation may be exposed to extreme temperatures over long periods of time.
Improved fire resistance: Higher-density calcium silicate insulation is typically more fire-resistant than lower-density insulation. This can help improve overall safety in high-temperature applications, particularly in industrial settings where fire hazards may be present.
Increased sound insulation: Higher-density calcium silicate insulation can provide better sound insulation than lower-density insulation, which can be beneficial in industrial settings where noise levels may be high.
Overall, higher-density calcium silicate insulation is a durable and effective choice for high-temperature applications where insulation performance, strength, and durability are critical. It is important to select the appropriate density of calcium silicate insulation for your specific application to ensure optimal thermal performance and insulation properties.
Posted on June 20, 2023
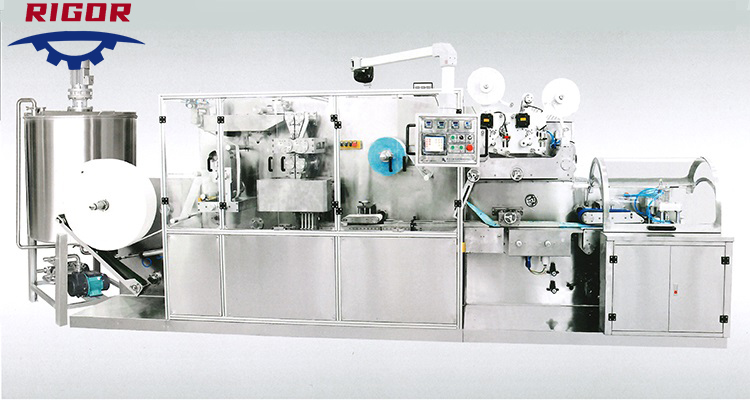
How to use Rid of wet wipes production line?
A wet wipes production line is a complex piece of machinery that requires careful operation and maintenance to ensure optimal performance and output.
Here are some basic steps for using a wet wipes production line:
Set up the machine: Before you begin using the wet wipes production line, make sure it is properly set up and calibrated according to the manufacturer’s instructions.
Prepare the raw materials: Depending on the type of wet wipes you are producing, you will need to prepare the appropriate raw materials, including the non-woven fabric, the solution, and any additional ingredients.
Load the materials: Load the non-woven fabric onto the machine and ensure that it is properly aligned and tensioned. Load the solution and any additional ingredients into the appropriate hopper.
Start the machine: Turn on the machine and begin the production process. The machine will automatically dispense the solution onto the non-woven fabric and cut it into individual wipes.
Inspect the quality: Regularly inspect the quality of the wet wipes to ensure they meet the required standards. This includes checking the moisture level, the size and shape of the wipes, and any additional quality parameters.
Package and store the wipes: Once the wet wipes have been produced, package them according to the desired specifications and store them in a clean, dry environment.
Clean and maintain the machine: Regularly clean and maintain the wet wipes production line to ensure optimal performance and prevent breakdowns or defects.
It’s important to follow the manufacturer’s instructions and safety guidelines when using a wet wipes production line. Additionally, ensure that all operators are properly trained and understand how to operate the machine safely and effectively.
How often should the machine be cleaned and maintained?
The frequency of cleaning and maintenance for a wet wipes production line depends on several factors, including the type of machine, the volume of production, wet wipes production line and the type of materials used. However, as a general guideline, the machine should be cleaned and maintained on a regular basis to ensure optimal performance and prevent breakdowns.
Here are some general guidelines for cleaning and maintaining a wet wipes production line:
Daily cleaning: The machine should be cleaned daily to remove any debris, dust, or other contaminants that may have accumulated during production. This includes wiping down the machine with a clean cloth and using a vacuum or compressed air to remove any dust or debris.
Weekly cleaning: In addition to daily cleaning, the machine should be thoroughly cleaned at least once a week. This includes disassembling the machine, cleaning all the parts, and lubricating any moving parts as needed.
Regular maintenance: Depending on the type of machine, regular maintenance may be required, such as replacing worn parts, tightening screws and bolts, and checking the electrical and mechanical components. This should be done according to the manufacturer’s instructions and schedule.
Emergency cleaning: In the event of a spill or other emergency, the machine should be immediately cleaned to prevent damage or contamination.
By following these guidelines, you can help ensure the long-term performance and durability of your wet wipes production line. Additionally, be sure to train all operators on the proper cleaning and maintenance procedures to ensure consistency and compliance with safety guidelines.
Posted on June 20, 2023
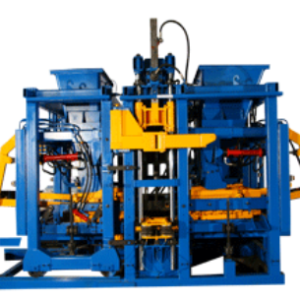
Make Concrete Blocks For A Living With A Solid Foundation
If you’re interested in making concrete blocks for a living, there are a few key things you’ll need to know in order to build a solid foundation for your business.
Here are some steps you can take:
Learn the process: Before you start making concrete blocks, it’s important to understand the process and materials involved. concrete brick making machine Research the different types of concrete blocks and the equipment needed to make them.
Create a business plan: Develop a business plan that outlines your goals, target market, marketing strategies, and financial projections. Consider the costs of equipment, materials, labor, and overhead expenses.
Obtain funding: Determine how much funding you’ll need to start your business. You may need to secure a loan or seek out investors to help finance your startup costs.
Secure a location: Find a suitable location for your business, such as a warehouse or manufacturing facility. You’ll need a space that is large enough to accommodate your equipment and materials.
Purchase equipment: Invest in the necessary equipment to make concrete blocks, including a block-making machine, mixer, and molds. You may also need a forklift or other machinery to move materials.
Source materials: Purchase the materials you’ll need to make your concrete blocks, including cement, sand, and gravel. Consider partnering with suppliers to ensure a steady supply of high-quality materials.
Hire employees: Hire skilled workers to operate your equipment and perform other essential tasks. Consider offering training programs to help your employees develop their skills and improve productivity.
Market your business: Develop a marketing plan to promote your business and attract customers. Consider using social media, advertising, and networking to reach potential customers.
With a solid foundation in place, you can start making concrete blocks and building a successful business. Remember to stay focused on your goals, continually improve your processes, and provide excellent customer service to ensure long-term success.
How can I ensure the quality of my concrete blocks?
Ensuring the quality of your concrete blocks is crucial to the success of your business.
Here are some tips to help you maintain high-quality standards:
Use high-quality materials: The quality of your concrete blocks depends on the quality of the materials you use. Make sure you source high-quality cement, sand, and aggregates from reputable suppliers.
Mix the ingredients properly: The mixing process is critical to producing high-quality concrete blocks. Make sure you follow the manufacturer’s instructions for mixing the ingredients and use the appropriate ratios for each component.
Test the strength of the blocks: Conduct regular strength tests on your concrete blocks to ensure they meet the required standards. You can do this by using a compression testing machine to measure the force required to break the block.
Monitor the curing process: The curing process is crucial to the strength and durability of your concrete blocks. Make sure you follow the manufacturer’s instructions for curing the blocks and monitor the process closely.
Inspect the blocks for defects: Regularly inspect your concrete blocks for defects such as cracks, chips, or other damage. This will help you identify any quality issues and take corrective action as needed.
Train your employees: Proper training is essential to maintaining quality standards. Make sure your employees understand the importance of quality control and are trained to identify and prevent quality issues.
By following these tips, you can ensure the quality of your concrete blocks and build a reputation for producing high-quality products. Remember to continually monitor and improve your processes to maintain your standards over time.